Friday, December 27, 2013

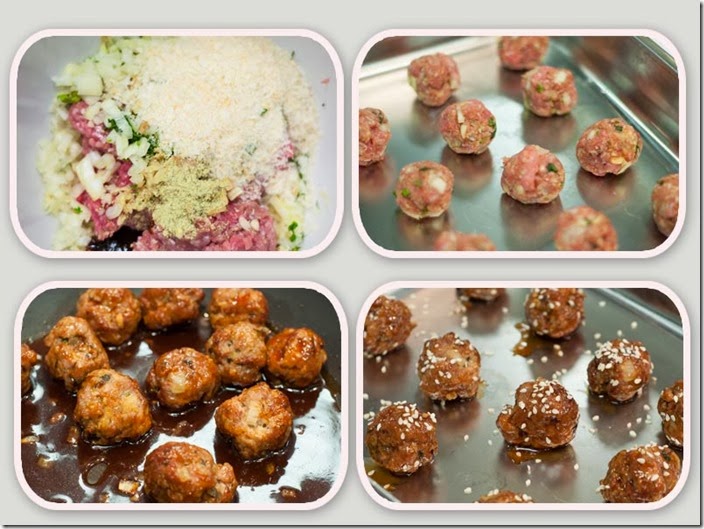
Asian Glazed Meatballs


AsianMeatballs

I’m always looking for recipes I can adapt for the Steam Combi ovens and it seems they can be quite hard to find so I have been experimenting again at work and came up with these yummy morsels.

This recipe will work in a regular dry oven as well as the Steam Combi oven so dont be put off if you don’t yet own one.

The secret to this recipe is that you put them in the oven twice, once to nearly cook, then remove them and toss them in the glaze, then return them to the oven to set the glaze.

The meatballs themselves have plenty of flavour but I think we eat with our eyes as well and the glaze not only imparts added flavour but makes them even more tempting to eat with the glistening golden brown coating.


These are great to serve as fingerfood  alone or with a dipping sauce, or you can serve as a meal with rice  in which case I would double the glaze recipe and drizzle the remainder over the meatballs when serving.

 meatballs2

ASIAN GLAZED MEATBALLS

INGREDIENTS

MEATBALLS
500gms minced pork
2 cloves garlic, crushed
1 small onion, finely chopped
knob of ginger, grated
small bunch coriander, chopped finely
1/2 cup panko breadcrumbs ( or use fresh )
1tspn green herb stock powder ( or use any other stock powder you desire- garlic,chicken or beef will work fine as well)
2 T Hoisin Sauce

GLAZE
2T Hoisin Sauce
4T Sweet Chilli Sauce
2 t Soy Sauce
1T Lime Juice
2T brown sugar

(To make glaze combine all ingredients in saucepan and heat until sugar is dissolved)

3 T  or more Sesame Seeds

METHOD

If using regular dry oven preheat to 180C ( 350F) In Steam Combi oven choose  Combination and preheat to 190C

Using your hands mix all the meatball ingredients together , and form small balls ( slightly smaller than a ping pong ball)

Place on greased baking dish and cook for 13 minutes.

Remove from oven and toss in glaze. Sprinkle or roll in Sesame Seeds.

Return to oven and cook for further 5 minutes or until golden brown.

Thursday, December 12, 2013

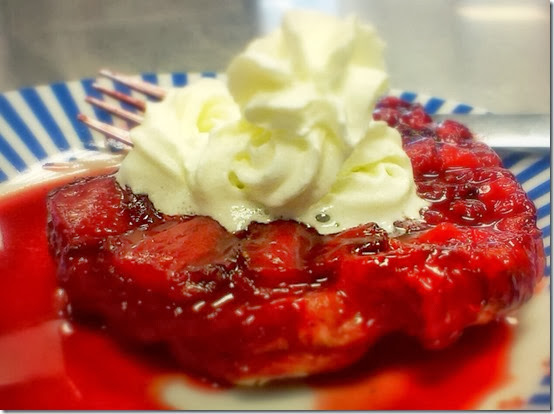
Mini Strawberry Tarte Tatin ( Steam Combi or Conventional Oven)


IMAG0716_1_1


Today at work I wanted to do some comparison cooking – to cook the same thing in a dry oven and also in a steam combi oven to see the differences in the results .

I wanted something easy and with available ingredients and I recalled a Mini Tarte Tatin recipe I had seen by Donna Hay in one of her cookbooks.

I normally make Tarte Tatin in a cast iron frypan but I had some mini cake tins and thought i would give these a go.

The resulting individual desserts were yummy , easy to make and delicious in both the dry oven and the steam combi – however the steam combi definitely resulted in  much lighter puffier pastry .

For a dessert in a hurry this is delicious dessert will leave lips smacking and wanting more.

STRAWBERRY MINI TARTE TATIN

INGREDIENTS: ( for 4 tarts)

12 Large or 16-20 small strawberries, sliced lengthwise
2 tablespoons  butter
4 tablespoons brown sugar
1/2 tspn Vanilla paste
2 sheets pre rolled  butter puff pastry

4 small pie dishes or small cake tins
(If using loose bottom cake tins you will also need to cut baking paper to line the base and sides of each tin.


METHOD:

IMAG0714_1

Line cake tins with baking paper if necessary ( no need to do this for tins that dont have loose bottoms)

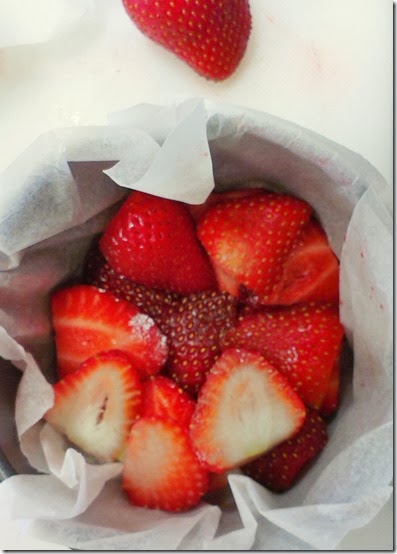
Place sliced strawberries in the bottom of each dish, arrange the bottom layer nicely with the larger outer edges toward the outside and the points toward the middle ( this will be the top of the tart when it is cooked)  . There is no need to pay so much attention for anything except that bottom layer.

In a small saucepan melt butter, and stir in brown sugar and vanilla and stir until melted and caramelised, but be careful not to burn .

Pour caramel over strawberries .

Cut 2 circles of pastry the size of each tin and carefully cover the fruit and tuck down the edges to form a good “seal” .Cover with second disc of pastry .

Heat oven to 200 degrees celcius ( 390F)

( Use Steam Combination if you have a Steam Combi Oven)

Cook for 20 minutes till pastry is risen and golden .

Rest for a couple of minutes then invert onto plate.

Serve with Cream or Icecream .

( You can replace the strawberrries with many other different fruits – Blueberries, sliced apricots or peaches,sliced pineapple,plums, apples or even bananas.)

If you cant get butter puff pastry, regular puff pastry will work just as well – it just doesnt quite have the same rich yumminess)

Tuesday, November 26, 2013

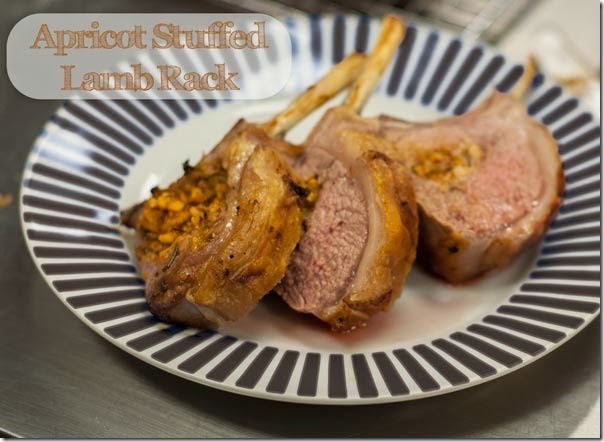
Apricot Stuffed Lamb Rack ( Steam Combi or Conventional Oven)

Lambrack1


One of my favourite cuts of meat is a Rack of Lamb. – Its so quick to cook and gives such an elegant result .

There are so many variations on how to cook it but this method will wow your guests and its really so easy to do.

This can be cooked in a Conventional Oven or in a Steam Combination oven.


lambrack2

Conventional Oven – heat to 210C

Steam Oven – Use  half steam and 220 C

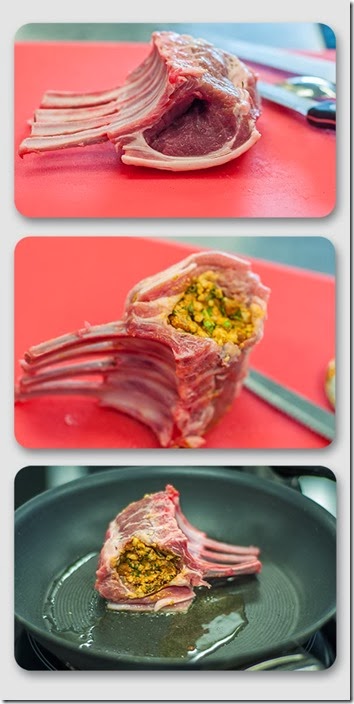
Firstly trim away some of the fat from the edge of the lamb leaving about 1/4 to half an inch .

Then take a small sharp knife and cut a slit in the meat about half an inch from the bone on each end of the rack  – With your finger bore a hole through the rack to form a tunnel.

Taking the stuffing a teaspoon full at a time stuff it into the tunnel until you have half filled it, then turn and stuff the other end.

Heat some oil in a frying pan and brown the meat, starting with the fatty side and then doing each end and the underside of the rack.

Just a few minutes will be sufficient .


Place the rack in the preheated oven for approximately 20 minutes for medium rare ( slightly pink meat inside)

Remove and let stand for at least 5 minutes if you can before slicing through each bone for serving


Apricot Lamb Stuffing

1/2 Cup Chopped Dried Apricots
1/2 Cup Chopped Raw Cashew Nuts  ( or you can replace with Breadcrumbs if you wish)
1 Spring of Rosemary ( Strip leaves from stem and discard stem)
small handful of Fresh Mint Leaves
1 tspn Sweet Paprika
1/2 tspn Salt
2-3tbsn lemon juice. and rind of half a lemon

Place all ingredients in foodprocessor and blitz to crumb consistency.

Apricots may be substituted with dates, prunes or any other dried fruit .  Mint and Rosemary may be substituted with any other fresh herbs.

Monday, November 25, 2013

Secret Ingredient Breaded Chicken

breadedchicken

Last night I had decided to cook chicken for dinner. I had some chicken tenderloins and wanted a quick tasty meal from them.

I opened my pantry and tried to let inspiration flow from within… not a lot flowed… But then I saw a new packet of Panko Breadcrumbs and thought that perhaps I should crumb the chicken.

Trouble is that crumbed chicken really needs a bit of resting time after you’ve crumbed it for the coating to “set” enough so that it doesn’t fall off when you cook it. – Isn’t that so frustrating when you spend time and get your fingers covered in eggy breadcrumbs just to have the crumbs fall off when you cook the chicken?

Additionally i fancied something a little tastier than regular crumbed chicken anyway.. so what to do….

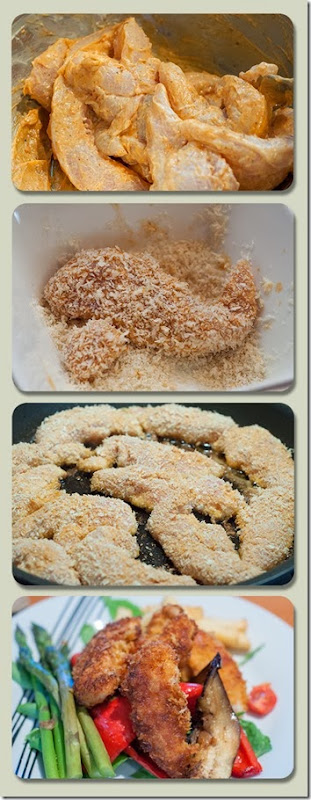
breadedchicken2Then it struck me – Sitting on the shelf next to the breadcrumbs was a new jar of mayonnaise. –

“Well “ I thought “It will either be fantastic, or disgusting  but I’m going to give it a go.

So into the bowl went about half a cup ( or so) of mayonnaise, and to that I added my spices. Now here you could completely use your imagination. If you have a favourite spice mix or dry marinade rub – add that – I made up a mix that Ive used with chicken in the past which includes brown sugar,Smoked Paprika, Black Pepper, Coriander, Mustard Powder, Garlic, Chili and Turmeric

(See below for quantities to make it in bulk)

I added about 2 tablespoons of the mix to the mayonnaise and mixed it up and then added the chicken and stirred it all around until it was well coated.

The thick mayonnaise really sticks well to the chicken and makes it easy for the breadcrumbs to stay stuck.

I used Panko Breadcrumbs but you could use regular dried breadcrumbs if you wanted.

I decided to pan fry the chicken to see how well the crumbs stuck  ( its when i pan fry that I often find the crumbs stick to the pan and not the chicken despite using a non stick pan)

Anyway – SUCCESS- the crumbs stayed stuck to where they should and the colouring from the spice mix made the chicken a beautiful golden brown ,and whats more the entire family were raving over the chicken.

You could oven bake the chicken instead of pan frying if you wish- in fact after giving my chicken a quick browning on both sides I did put it in the oven to finish off cooking.

I served  my chicken on a salad of rocket ( arugula), halved cherry tomatoes, red pepper and eggplant(which I had cut into long slices and basted with olive oil before putting on my griddle pan to cook) , and asparagus .

Unfortunately I was out of potatoes so had to resort to oven fries ( not my favourite form of potato)


Smokey Sticky Chicken Rub Spice Mix

3Tbspn Brown Sugar
3 Tspn Smoked Paprika
3 Tspn Garlic Flakes
2 Tspn Sea Salt
1 Tspn Coriander
1/2 Tspn Mustard Powder or Yellow Mustard Seeds
1/2 Tspn Dried Chilli Powder
1/2 Tspn Turmeric

Mix all together with Mortar and Pestle, or whizz up in spice grinder – Store in airtight container.

Sunday, November 17, 2013

Mediterranean Chicken Roulade


Last week as part of my training for my great new job I spent a morning in the Bosch Kitchen with their trainer Shannon.

We had a great time cooking up some wonderful dishes, amongst them was a Chicken Roulade from this months Taste magazine .

Roulades look so appealing, and look quite complex but actually are very simple to create and make such a visually impressive dish with not much work.

When I got home I decided to make one for our dinner that night using slightly different ingredients than the one we had made in the morning .

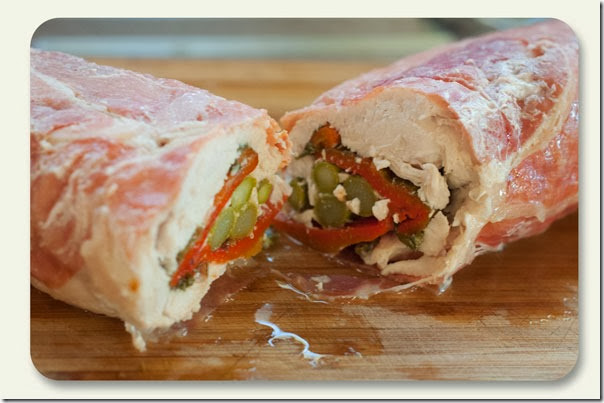
In my pantry I had a jar of roasted red peppers and I had a bunch of asparagus in the chiller because its Steve’s favourite vegetable and I thought that the combination of the red and green might make a nice contrast inside my roulade.

Start by taking boneless skinless chicken breasts and bash the living dayight out of them using whatever you have handy – I used a rolling pin but you could use a heavy bottle or a tenderising hammer or whatever you like.

Its a great way of relieving the days stresses . Bash that chicken till its about half an inch thick. I used 4 chicken breasts in my roulade..

The main pressure point in creating a roulade is getting it rolled up – this is how I did it.


roulade1

I cut a large piece of aluminium foil and sprayed it with a non stick cooking spray ( or you could wipe it with olive oil)

I laid out 8 pieces of proscuitto – this will form the outer wrapper of your roulade so try not to leave any holes.
You could use Streaky Bacon instead if you wanted.
Next lay out your chicken over the top of the proscuitto .


roulade2

Now its time to add your filling.

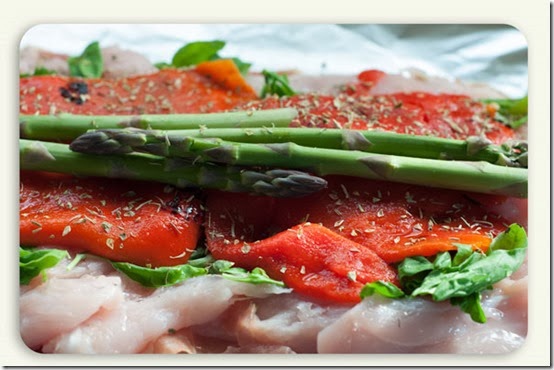
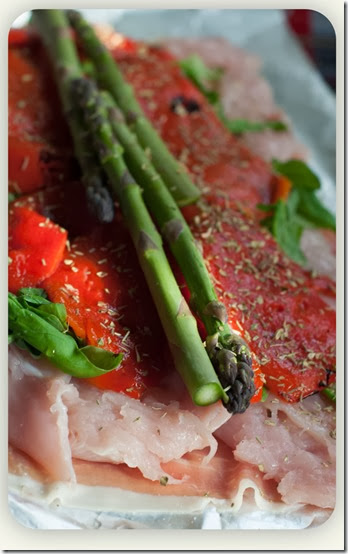
I started with a layer of basil leaves and then as I said I used roasted red pepper and asparagus but you could use whatever you wanted – feta, spinach, prunes and caramelised onion, ham and cheddar cheese, – minced meat stuffing and boiled eggs, you name it – the variety is endless


Once you have your ingredients laid out, season with salt and pepper and any herbs or spices you wish to use and then carefully start rolling by holding the  foil and form a thick tube. ( be careful not to roll the foil into the roulade itself . Once you’ve formed your tube shape tighten the tin foil around the roulade as tight as you can and then fold closed the ends.

Cook at 180 C for 75 minutes or until juices run clear.

Leave to stand for about 10  minutes to settle after taking it out of the oven, then unwrap and slice to serve.

roulade3

Sunday, November 10, 2013

Gluten Free Parmesan Crackers

crackers

Last week a friend bought some home made gluten free crackers with her for a shared lunch.

They were really very delicious, and had the benefit of being gluten free . ( not that Im particularly intolerant to gluten but its always nice to be able to offer something to someone who is )

The basis of these crackers was almond meal and the recipe was remarkably simple . You can find it on this website.

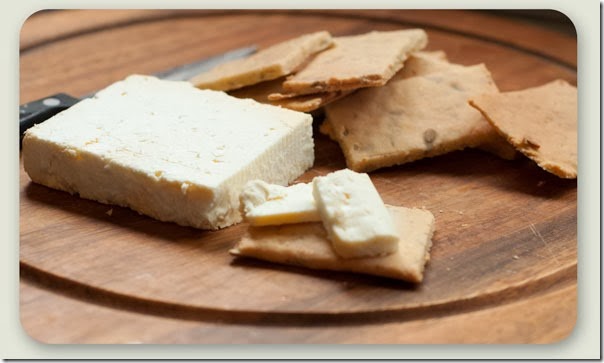
Being short of rosemary in my garden at the moment ( blame years of neglect)  I started thinking  about other flavourings that could be used in these crackers and so I came up with the following recipe which was so yummy I had to hide some in order to photograph them!

GLUTEN FREE PARMESAN CRACKERS

Ingredients

  • 1 cup almond meal ( I got mine from the bulk bins in the supermarket)
  • ½ tablespoon olive oil (You could use an infused oil for a different taste – I love Al Brown’s Orange and Chili Oil )
  • 2 tablespoons cold water
  • ½ teaspoon  salt
  • 1/2 cup grated Parmesan Cheese
  • 3 teaspoons raw sunflower seeds or any other seed ( sesame would be great)

Instructions

  1. Preheat your oven to 160 Celcius – Fanbake
  2. Throw all the ingredients into a the food processor. (If you have a small processor bowl use that) and blitz for a minute or so till thoroughly combined. If you like the seedy look then omit the seeds when you do the initial processing and add them later and just do one or two pulses with your processor to combine them into the dough.
  3. Remove dough and form a ball .Place on a large sheet of baking paper. Place dough in paper on top of baking sheet for rolling.  Fold paper in half over the top  of the dough and roll out to approximately 3 mm thick  ( the fold in the paper forms one straight edge which makes trimming easier
  4. With a knife score the dough through into rectangles or squares depending on what shape you want your crackers. You can reform the edges and re roll to make them all have straight edges.
  5. Bake for 15 minutes,or until golden. Let cool on a wire rack for 15 minutes, then once cold  carefully break the crackers apart.
  6. These will most likely be eaten before they get to need to be stored, but on that rare occasion keep them in an airtight container.

Saturday, November 2, 2013

A Saturday Night Dinner for Two in less than half an hour.


lamb2

It is a bit of a treat to be able to cook for just Steve and I in the weekends, and it is starting to happen a bit more frequently now the kids get older. It means not having to cater to fussy tastes and find a meal that suits everyone.

Tonight was one of those nights.

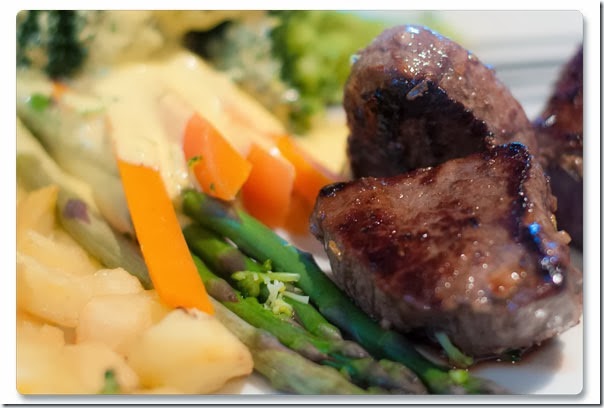
Steve fancied lamb and I happened to have bought some Silver Fern Farms Lamb Medallions that were on special at the supermarket .

They aren’t a budget product by any means but they are beautifully trimmed and vaccuum packed so they last quite a while in the refrigerator ( though they didn’t have to wait too long in my house) .

I often do a nice salad with lamb but Steve asked for vegetables and so I decided to make a nice light lemony hollondaise sauce to go with them .

For potatoes, I peeled and cubed a couple of small potatoes and just seasoned them and browned them in a frying pan in a tablespoon of olive oil , and then put the whole pan in a hottish oven ( 210C) to cook while i prepared every thing else.

The lamb I rubbed with a spice mix  from Annabel Langbeins latest book , A Free Range Summer Annual .
She has 3 different rub recipes in the book and I’ve made up all of them and have been using them quite a bit. ( Love the Asian one on pork belly) – I used the Moroccan rub for the lamb this time.

Next I put the water on for the veges. To make it easier I just used one pot – and I put the carrots in first, followed by some broccoli and let it cook for a few minutes.

While the veges were cooking I made the hollandaise sauce.  It was really a “cheats” hollandaise and its very simple.

I use my stick blender to make hollandaise.

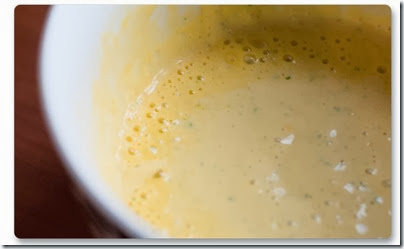
hollandaiseIn a small container whisk up 2 egg yolks,with a tablespoon of lemon juice, a teaspoon of Dijon mustard , salt and pepper and some chopped herbs ( I used Italian parsley and thyme)

Then, while whisking with the stick blender, in a slow stream add about 1/3 cup of melted butter.  - ideally you would use clarified butter but my world isn’t ideal so I just use regular salted butter that I melted in the microwave.


The sauce thickens almost immediately to a yummy creamy deliciousness. 

You may want to adjust your seasoning to taste at this point ( I added a bit more lemon juice cause i like the lemony taste with my vegetables .

Next job – heat up the pan for  your lamb.

I rubbed the lamb with a bit of olive oil  ( I don’t add it to the pan – just to the meat) – and heated the pan to a medium high ( too high and your spices and oil will just burn and spoil the taste)

Sear the lamb on one side for a few minutes, then turn and repeat for the other side.

Then pop the lamb into the hot oven with the potatoes to finish cooking.

I then added the asparagus to the vegetables – it only takes a few minutes ( Nothing worse than limp grey looking asparagus)

Take the meat out when its done to your liking ( I like medium rare – still pink in the centre)  and let it rest while you plate up the potatoes and vegetables.

Spoon the hollandaise over the veges

You could just use it over the asparagus or the broccoli but I like it on all the veges I used!

Finally dish up the lamb – and enjoy – preferably with a nice glass of pinot noir!!

lamb1

I chose Hāhā 2012 Marlborough Pinot Noir which  both Steve and I thought was a perfect match.

Monday, October 28, 2013

No Bake Berry Cheesecake


On Saturday night I went out to a friends house to have a celebration dinner- why celebrate? well be both had just started new jobs.

I mentioned in a previous post that my life was about to change and indeed it has.

Last week I started a new job as Cooking Tutor at Kitchen Things which is an upmarket Kitchen Appliance store chain in New Zealand.

My job will be to teach people how to help people decide which new oven is best for them through cooking demonstration classes and then also to help new purchasers get the most out of their new ovens and cooktops with classes tailored to their individual needs.

Most exciting huh!!- and right up my alley  and though a huge change from the designing job I’ve had for the last 10 years I am able to call upon the skills Ive developed in teaching photoshop, hosting retreats and classes, public speaking about scrapbooking and family history, and selling at tradeshows. All these skills I’ve learned helped me get the job.  - well that and my love of cooking and food!!


Anyway back to the dinner – I offered to take dessert and with the spring weather seeing the strawberries and raspberries in the supermarket I decided to make a cheesecake.

I didnt have time to bake one so I looked at numerous recipes and developed this no bake cheesecake recipe.

Basically a no bake cheesecake relies on gelatine to make it set, and doesn’t include eggs so in some ways its a lot less rich than a traditional baked cheesecake


Now I have to apologise in advance for the photo quality – I didn’t have my camera handy when we cut the cheesecake at my friends house and so were taken by Steve with his Iphone – he clearly needs some training in food styling photography!


Anyway  - here is the recipe that I developed.

NO BAKE BERRY CHEESECAKE

Ingredients:

1/2- 3/4 packet of plain biscuits ( for the americans I mean cookies – something like graham crackers or similar) for anyone else – wine biscuits or arrowroot or something similar. I used Griffins Krispies.
1/4 cup chocolate chips ( optional)
1/3- 1/2 cup of threaded or dessicated coconut
100gms butter, melted

500gms cream cheese
1 cup Greek Yoghurt
1/3 cup sugar
500gms  frozen berries- defrosted  or fresh ( I used a mixture of fresh strawberrries and frozen raspberries)
Rind and juice of one lemon
2tbspn gelatine
3tbsnp boiling water

1/4 cup sugar
3 tbspn berry or lemon liqueur such as framboise or limoncello – or lemon juice
1 further tspn gelatine dissloved in boiling water

Method:

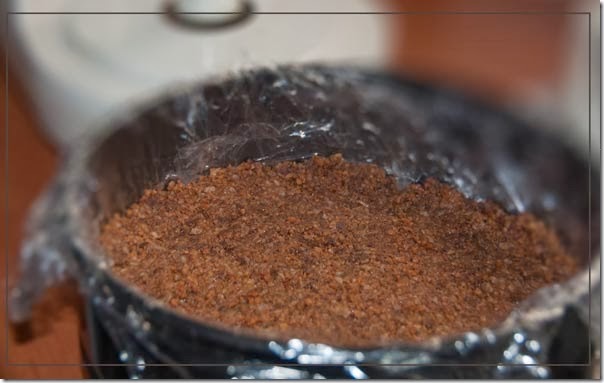
Line the base and sides of an 8 inch loose bottom cake tin with plastic wrap.

In a food processor ,process the biscuits coconut and chocolate to crumb consistency. Add melted butter process for a few more seconds till blended.

Press into the base of the cake tin. ( Its up to you how thick you like your base – use lower quantities for a thinner base and more for a thicker base)
Cheesecake1

Chill base while preparing the filling.

After cleaning the bowl of the food processor,  process cream cheese, yoghurt , finely grated lemon rind, lemon juice and sugar till smooth.
If you wish the filling to be coloured pink then add some juice from the berries as well.

Stir the gelatine into the boiling water until it has dissolved and add to the cream cheese mixture.

Fold in half the berries .

Pour cheese mixture onto base and refrigerate till set ( about 2 hours for me)

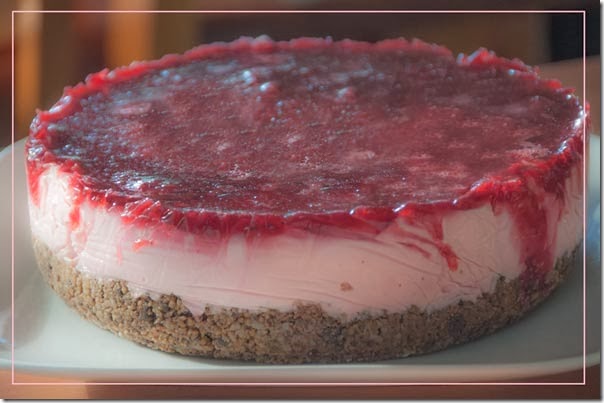
In a saucepan place the rest of the berries and the sugar , liqueur or lemon juiceand bring to a slow boil to cook the fruit . Mash fruit into the juice that is created to form a sauce.
Add dissolved gelatine.

Pour sauce over the top of the chilled cheesecake and chill again until set ( about an hour was enough for mine)

When you are ready to serve lift the cheesecake out from the tin by the plastic wrap
Cheesecake


Keep refrigerated until ready to serve.
Slice and enjoy ( I reserved some of the fruit sauce for serving but thats up to you)
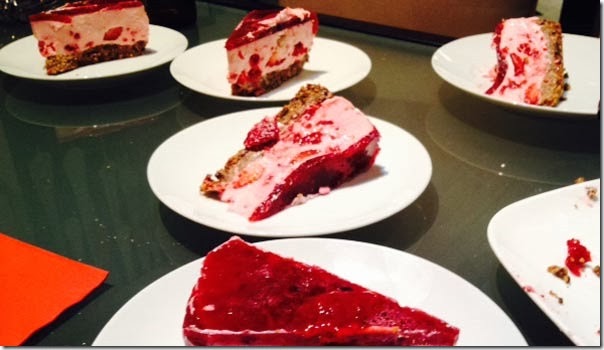
cheesecake3

Monday, October 21, 2013

Secret Weapon Number 2 - Microplane


I’m quite an opinionated person – yeah I know I look like butter wouldn’t melt in my mouth (cough) but I can be quite um – well lets say firm in my views at times. 

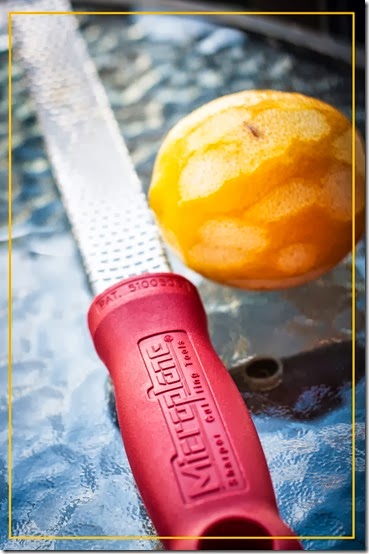
microplaneThere are times when my opinions aren’t very malleable too – hard to believe I know - - but you know that sometimes I just have to eat my words,  (or in this case my cheese or lemon rind or chocolate -Lets eat chocolate!) because before I owned one I thought that any old fine grater would do- Why would you want to pay the hideous  price they charge for a Microplane version of a grater - - Hey my $2 box grater does the job!


Well – gobble gobble gobble – that’s me having eaten my words ! I now own 2 microplanes with varying styles of blade - and could NOT do without them – and I want MORE!

In my photo above I included the grated lemon – just to show you how fine the amount of rind that the microplane removes so you get all of the delicious oily lemony skin but none of the bitter icky pith. – When you use it for parmesan or chocolate it creates beautiful fine curly tendrils that melt in seconds – and its SHARP! watch those fingers – it does a marvellous job of shredding fingernails if you let it!

If you are wavering on the borderline of buying one – go now – dont hesitate –you wont regret it!

Saturday, October 19, 2013

A “Free Range Foodie” Dinner


I mentioned in an earlier post that I had recently been chosen as one of Annabel Langbein’s Free Range Foodie Panel.

What this entailed was having early access to her upcoming new Cookbook – then hosting an “event” where I would cook from the new book, and take some photos of the food and fun that resulted.

The book arrived on Wednesday and I was excited to see it. – Its format is a little different from some of her other books in that this is laid out more like a magazine, with articles throughout it and lots of hints and tips throughout.

What hasn’t changed from her other books is the great photography and the scrumptious recipes, all of which follow a pattern of delicious food that’s relatively stress free to prepare and easy to get great results from which was very fortuitous for me because yesterday turned into something of a frenetic day ( more about this next week – very exciting changes are about to occur in my life!)

I chose to cook 3 courses and of course I had to include a liquid refreshment too and Annabel catered well to me in her selection of liquid recipes as well .

rub

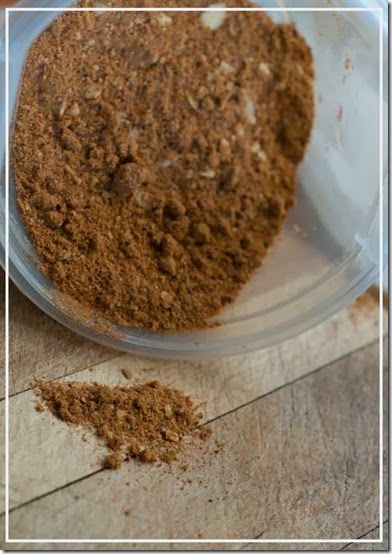
As you know I’m a lover of New Zealand Lamb and often cook a butterflied leg so seeing the range of spice rubs in the book made the decision on a main course easy – I made up a batch of the Moroccan Rub ( which is now a new favourite and I will surely be making more of this.

The recipe for the rub makes quite a bit so I have it stored away in my pantry. It would make a great gift at Christmas packaged up in some little bags with some suggestions on uses.


In the early afternoon coated the Meat with Olive Oil.

(I used my current favourite oil  Al Browns Olive and Chili infused oil which was a perfect match with the spices in the rub )

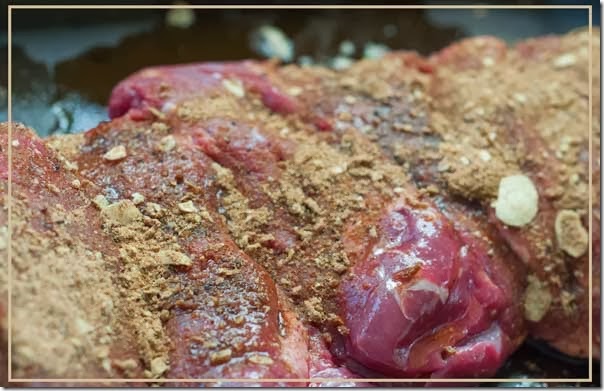
I then applied a generous amount of the rub to the cut side of my meat

I didn’t apply it to the fat side of the meat as I like to sear this in a pan  before putting in the oven  and I didn’t want the spices to burn .

meat


I rubbed it well into the meat including into all the crevices and let it marinate for a few hours before cooking.

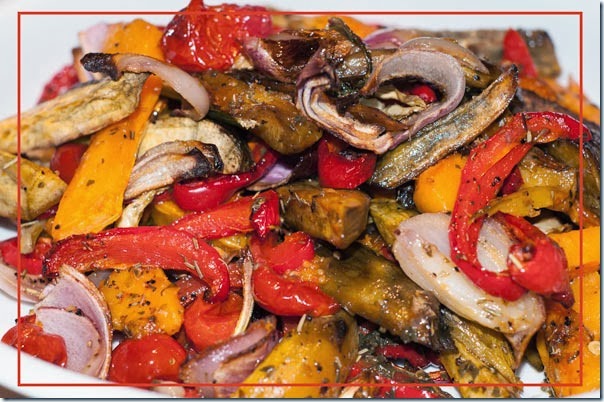
For vegetables I went with the Roast Summer Vegetables with Pesto Dressing.  Red Peppers have been reallye expensive lately but I had got a bag on sale from Nosh so that was what tipped me in favour of this dish – that and its so easy and being able to prepare it all in advance makes for a stress free evening


Next task was to start on making the starter.

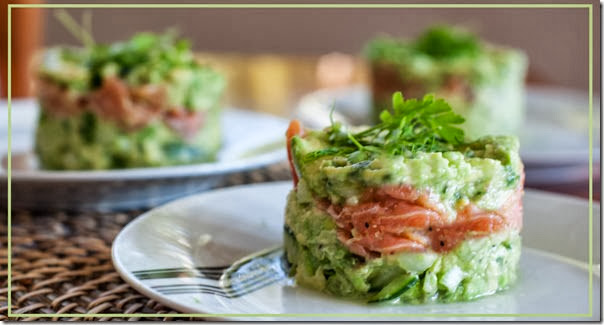
I chose the Avocado and Salmon Towers – which look quite impressive  and tricky but turned out to be quite simple.

I didnt have a deep enough food ring to create the towers in so I cut both ends off a can of tomatoes and used that as my mould – I tamped down the layers with a glass as I went .

towers


They are a lovely light entree and one I will definitely make again – I thought afterward I could have added a layer of tomatoes to make a 3 colour tower and may well do this in the future.


veges


To accompany this I made the 2 minute green salad which consisted of Rocket and shaved parmesan – but I also added some crumbled blue cheese cause I love it .

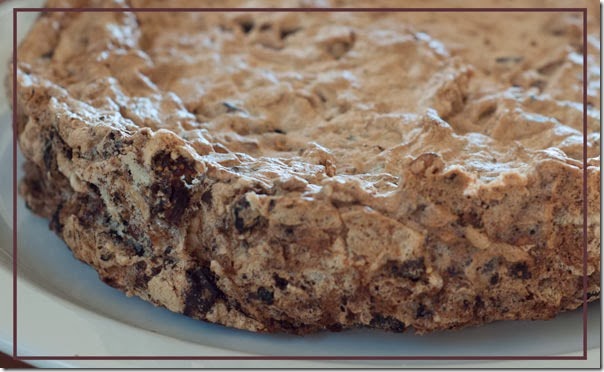
Dessert I had made the night before – I went with the Chocolate Meringe Torte which is quite different to anything I’ve made before but very easy to prepare


torte


It was almost time for the guests to arrive so I made up a jug of Annabel’s Waiheke Island Iced Tea. This tea certainly packs a punch and is most delicious – another new favourite recipe!


drink


There is nothing better than sharing food and drink with friends and so no matter what I had served al good time would be guaranteed however I can say that the compliments abounded in regards to the food and drink last night and a great time was had by all concerned

guests1image

imageimage


At the last minute I decided to top the lamb with a tzatziki sauce recipe also in the book and it was a great decision as it really added a wonderful flavour to the meat

imageimage

image

image


I served the Torte with thickened cream that I had grated chocolate and sprinkled cinnamon onto – it was the perfect accompaniment to a delicious and not too rich dessert.

All I can say now is Thanks to Annabel Langbein for providing the delicious ideas and recipes – I thoroughly recommend the Summer Annual and you are sure to see more results in this blog as I try out more of the recipes .

According to the back of the book it has an RRP of $19.95 which I think is a great price for a book you are sure to use frequently.

Thursday, October 17, 2013

Secret Weapon Number 1


I have lots and lots of secret weapons in the kitchen. Some of them are tools, some of them are sauces, or spices or little extras that just make cooking something delicious that much easier.

I have quite a lot of them so its about time I started posting them.

I’m sorry for my American readers some of them you might not have access to –you will just have to come down here and try them yourself!


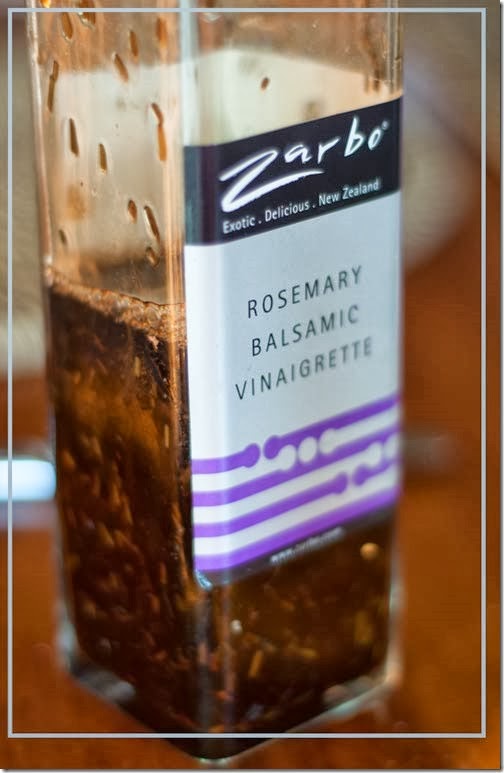
Actually my first secret weapon is one of those - Zarbo’s Rosemary Balsamic Vinaigrette.

zarbo


Actually I think the name is a bit deceiving. I’ve actually never used it as a salad dressing but its wonderful as a meat dressing.  I’ve used it in marinades before cooking on beef and lamb, but it really comes into its own as a drizzle on meat fresh out of the oven. Its got to the point that I wont even cook a butterflied leg of lamb if I dont have a bottle of Rosemary Balsamic on hand.

Its rich and dark and delicious – its even wonderful drizzled over plain old barbequed sausages straight off the barbeque.


I’ve tried making my own and frankly nothing seems to compare –

The closest I’ve come to it is a mixture of Balsamic Vinegar ( Ok thats a given)
Rosemary ( Another given)
Olive Oil
and some Pomegranate Syrup ( Another of my secret weapons – will talk about this some other time)

If I finally get a result that even comes close to this one I’ll be sure to give you the recipe -  in the mean time Ill buy mine !

You can buy it from from Zarbo’s website and their shop and a few other places.

Tuesday, October 15, 2013

Little Cups of Happy Deliciousness


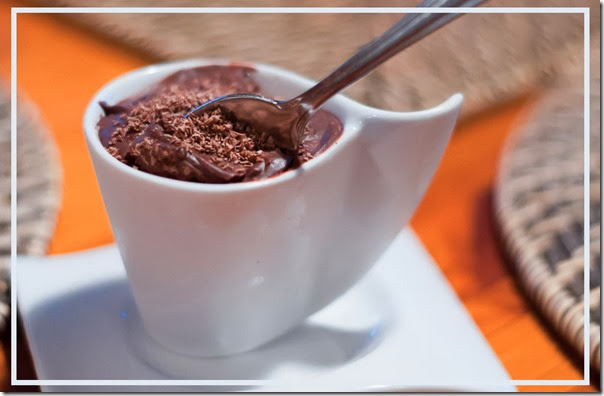
To whet our appetites, while we are waiting for our  new Free Range Summer Annual Cookbooks to arrive for the Free Range Foodie Panel, we were sent a couple of recipes, including this Three Ingredient Cheats Chocolate Mousse.

My mouth is literally watering as I remember the moreish goodness of these little pots of scrummy yumminess.

mousse

Annabel posted the recipe on her website today as recipe of the week so you can see it here .

Three Ingredients is all it takes – Chocolate, Marshmallows and Cream! 

I used Whittaker’s Dark Ghana Chocolate which is 72% Cocoa and is lovely and dark with a slightly bitter almost espresso flavour. I think that using a really dark chocolate like that helps keep this recipe from being too super sweet.

I served mine in little espresso cups – and really that was the perfect size, although some people in the family could have ( and did) eat 2!

I’ll be definitely making these again – They would be great served with biscotti on the side – Annabel has a ginger biscotti recipe in her Simple Pleasures Book which sound perfect to me.

Sunday, October 13, 2013

A Fasting Day Dinner


In case you aren’t aware, I’ve been following the 5:2 or Intermittent Fasting Diet for most of this year.
Ive found it really to be the only eating plan that suits my lifestyle being that I’m absolutely hopeless when it comes to deprivation.

I simply cant stick to a diet that doesn’t allow me to eat yummy food or drink delicious wines, and that’s the beauty of the 5:2 diet – you only have to cope with that deprivation 2 days a week.

Now don’t get me wrong – those 2 days can be quite hard on the soul of a foodie like me but knowing that tomorrow I can indulge just a little bit makes it much easier.

Ive lost 11kg this year on this diet ( and 10cm from my waist and 8cm from my hips) so I know it works for me, and the best thing about it is that its easy to stick to – Ive been eating this way now for 9 months ( with a brief break during my holiday to the US earlier this year) .
Im sure if I watched what i ate and drank more on my non fasting days I would have lost more weight but Im happy with this slow and steady loss and still being able to treat myself occasionally on non fasting days.

Its not true fasting – you are allowed ( as a woman) 500 calories on a fasting day.  I have to say it doesnt go very far and initially i tried eating a small breakfast and then dinner but I found that by 4pm I was getting very irritable and not really worth living with, so I changed my pattern so that I eat almost nothing through the day. Weirdly its once you eat something you often feel hungrier, so by not eating that solves that problem.

I cant live without  my coffees, and I allow myself 1/3 cup of trim  milk for my 2 coffees on my fast days  ( It froths up to nearly a whole jug full when I steam it with my machine)

That accounts for 32 of my 500 calories.

If I’m absolutely starving around lunchtime I will eat a hard boiled egg  ( 78 calories)

That leaves almost 400 calories for my dinner and I find that works well for me. I can usually adapt whatever I’m cooking for the family for myself and get in under that limit..

I usually have my fasting days on Mondays and Wednesdays – Today being Monday was my fasting day – and it was a bit of a struggle today I must admit as I had yesterdays cookies sitting tempting me on the bench and then my mother bought round a most divine looking carrot cake that her neighbour had baked for her – but resist I did – Call me Devoted !

Tonights dinner for the family was Linguine with a tomato,pepper aubergine and chorizo sauce. – I was easily able to adapt that for myself to make a very low calorie option.

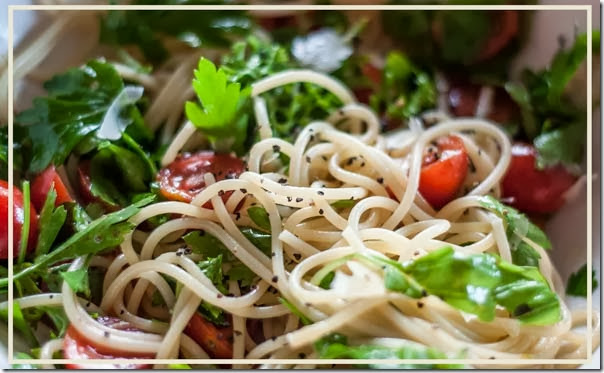
My dinner was Cherry Tomato and Herb Linguine. Its yummy! – I actually prefer this light summery pasta to the heavier sausage pasta the rest of the family had. ( Of course I would love it  more with a nice glass of Pinot Noir but that will have to wait till tomorrow!)


spaghetti


Cherry Tomato and Herb Linguine

1c cooked Pasta of your choice
1c Cherry Tomatoes – halved
1/4 red chilli – chopped
1 tspn Olive Oil ( I like to use a flavoured oil like Garlic or Lemon Infused)
1/3 cup chopped fresh herbs ( Basil, Parsley Oregano, Chives – whatever you have on hand)
10gms Parmesan, shaved
1 tspn balsamic vinegar
Black Pepper

While the pasta is cooking, in a bowl toss all the other ingredients except the parmesan and pepper .
Add hot pasta and toss again.
Serve topped with parmesan and black pepper.

Total calories for this meal 377.

Saturday, October 12, 2013

Simple and Delicious Cookies times 3


Samplercookies

While I love to cook meal time food, I’m not quite so  practised at baking. Partially this is because I know if I bake I will want to eat the results, and partially its because I really seem to be a little more challenged in this form of cooking so when I do put my hand to baking the recipe needs to be simple and failproof. – Ok that should read foolproof but that would be admitting more than I care to today!

Annabel Langbein’s book Simple Pleasures includes a recipe she calls Sampler Cookies. She gives a Butter Cookie Base recipe and various options to flavour the dough with.

You can find the recipe on her website here.

I made half the recipe and divided the dough into 3.

The first batch I added Cranberries and White Chocolate, the second batch raisins and cornflakes, and the third batch I added 1/2 teaspoon of almond essence and topped with half a glace cherry (this is  my favourite of the 3)

Do you like my Photo above of my cookies all stacked up!  ( they were warm out of the oven and smelled delicious and it was all I could do not to bite right into them  there and then.)

I really like that you can freeze some of the dough to cook at a later date so next time I’ll be making more!
These would make awesome little Christmas gifts  , stacked  up in a tubular bag with a red bow dont you think?

Oh and can I also give some applause here to the person at Nestle who thought to come up with Condensed Milk in a Tube.  It makes it so much easier when you just want to use a small amount as you do in this recipe!

Thursday, October 10, 2013

At Last..


I’ve had a long interest in food and wine, not in any professional sense but I have a (slightly  obsessional) love of recipe books and foodie magazines, I love to entertain, and I love to drink wine. – All three go hand in hand and so I’m often in the kitchen experimenting – trying to encourage my family to try new foods.
Having said that in recent years I’ve gone for a much more simple style in the food I like to try – recipes that rely more on the quality ingredients we can get in New Zealand that really speak for themselves.
For years some of my friends, especially the many “e-friends” I have, have suggested I start a food blog – heck my friend Tina who has the hugely popular sugarbeanbakers blog started her blog on the suggestion of me and my husband!
Last week I saw a call on Annabel Langbeins website for people to be on her Free Range Foodie Team. – For the scrapbooker friends of mine I would suggest this is very similar to a Designers Creative team –- so in essence a Culinary Creative Team.
I immediately applied, knowing that it would be just up my alley. I love Annabels Free Range Series of books and TV shows  and anyone who follows me on facebook  or who has been to our Scrapbooking your Family History classes, knows I’ve lately been spreading the  word of her Ultimate Chocolate Brownies and Anzac Biscuits far and wide . ( though I must admit to swapping out the raisins and almonds for chopped ginger and chocolate and dipping the bottoms in chocolate too – decadence !)
Anyway – last night – I got word by email that my application had been accepted – how FUN is this going to be!- I cant wait to receive the pre release version of her next book so I can cook for my friends ( already have a waiting list !)
This was the impetus I needed to get this blog up and running.
I hope you find something of interest in here – I intend to not just limit my posts to food but also to wine, and kitchen appliances  and recipe books and magazines - and fairly often its likely to be just a general food related rant .
In case you don’t know me from elsewhere – I’m a Digital Scrapbook Product Designer – have been for over 10 years – I work from home though I’m a people person so that can get a bit lonely at times. – I love photography too so it will be fun to learn food styling photography as I go ( I wish to be Tina when I grow up who is an extremely talented food photographer. ) My other passion of late is family history and I have a family history blog which is a whole other exciting journey.